Jun 9, 2009

Candy Wrapper Bracelet Tutorial

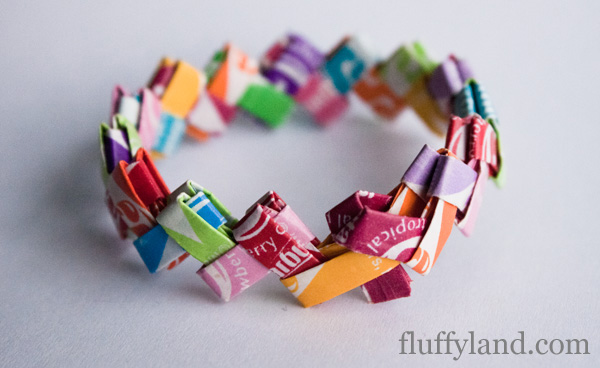
It has long been a fascination of mine to find out how these candy wrapper trinkets are actually made. This seems to be the "easiest" of them all...even though all of them seem to be for the very persistent crafter. It is fun to try though, if you happen to have time on your hands. Here is a tutorial from www.fluffyland.com/blog

Starburst Wrapper Bracelet Tutorial
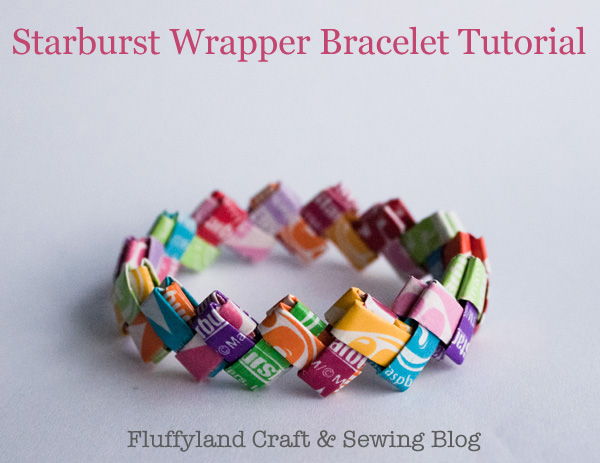
starburst bracelet!

So, have you been wondering how to make the amazing bracelets from Starburst wrappers? A simple folding method, plus some finishing tips, will help you make your very own Starburst bracelet. Using these simple instructions, you’ll soon memorize the folding pattern, and it’ll be a piece of cake! (or candy..) The average bracelet takes 30-35 Starburst wrappers, so save up! Asking friends to unwrap carefully and “donate” helps quite a bit. Also, to avoid candy binges and sugar highs, unwrapping all your Starbursts and saving them in a ziploc bag for later munching is helpful.

Keep in mind that when you have finished, you need the bracelet big enough to slide on and off your wrist without too much trouble. Because of the folding method, the bracelet will stretch slightly, so this shouldn’t be much of a problem.. but be careful.

Click on any of the photos for a larger view.

Step 1
starburst wrapper bracelet tutorial
Take your first wrapper… and flip it over.
I know, it’s tricky.

Step 2
starburst wrapper bracelet tutorial
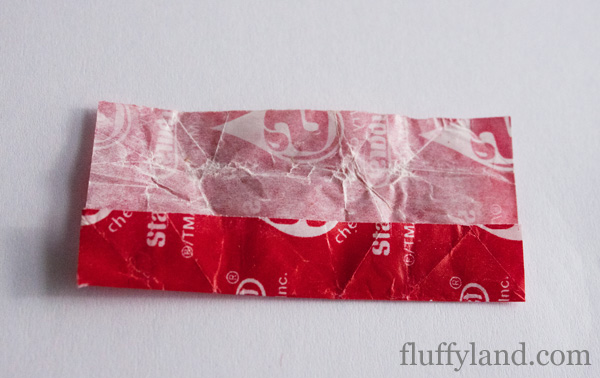
Fold (hot dog) one side in to the halfway point.
Step 3
starburst wrapper bracelet tutorial
Fold (hot dog) the other side to the halfway point.

Step 4
starburst wrapper bracelet tutorial
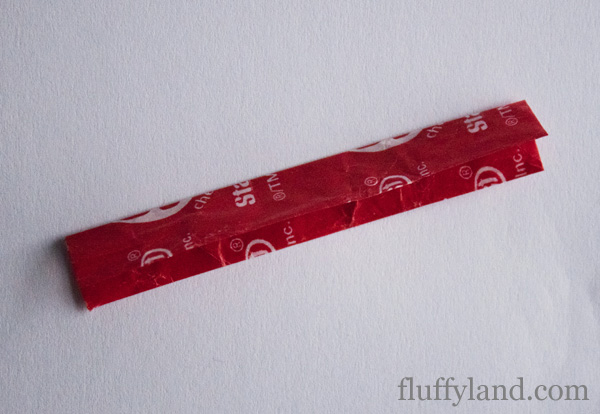
Next, fold (hot dog) the whole thing in half so the raw edges you just folded are on the inside crease.
Step 5
starburst wrapper bracelet tutorial
Fold (hot dog) in half again.

Step 6
starburst wrapper bracelet tutorial
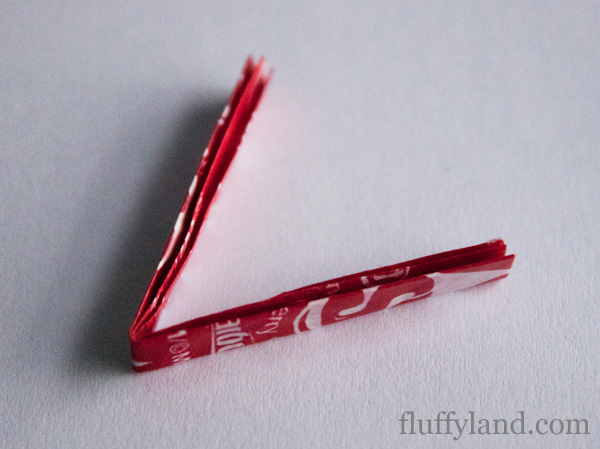
Fold (hamburger) in half.

Step 7
starburst wrapper bracelet tutorial
Fold (hamburger) one side to the halfway point.
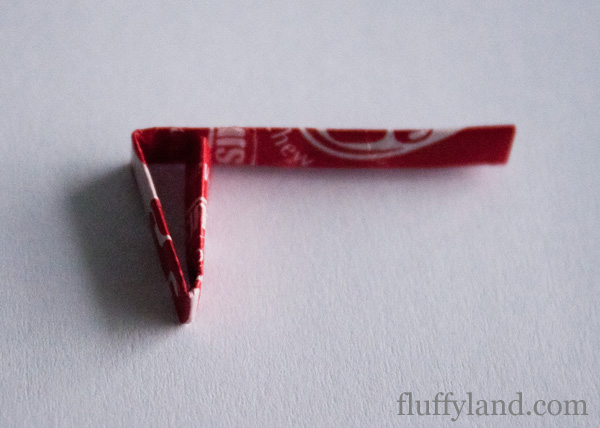
Step 8
starburst wrapper bracelet tutorial
Fold (hamburger) the other side to the halfway point.
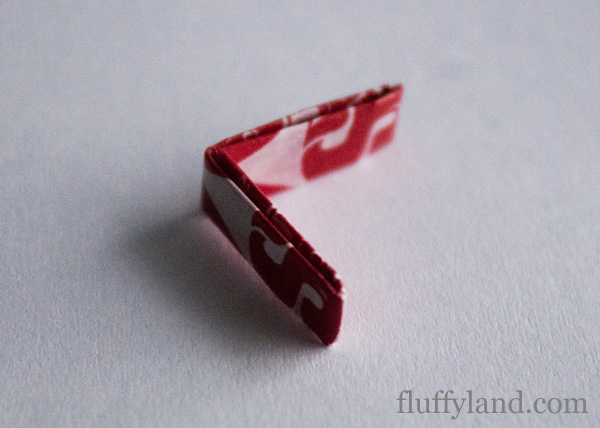
Repeat steps 1-8 with the next wrapper.

Step 9
starburst wrapper bracelet tutorial
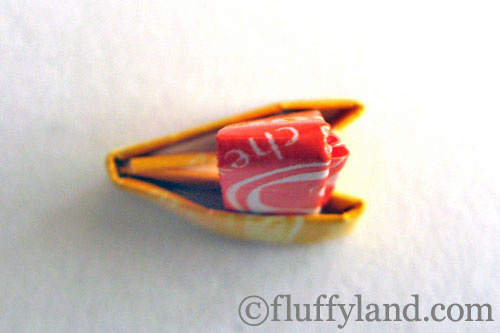
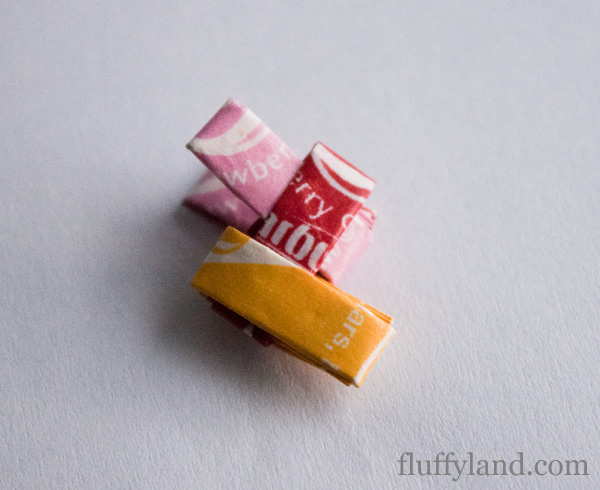
Insert points 1 and 2 into slots A and B, so it looks like this:
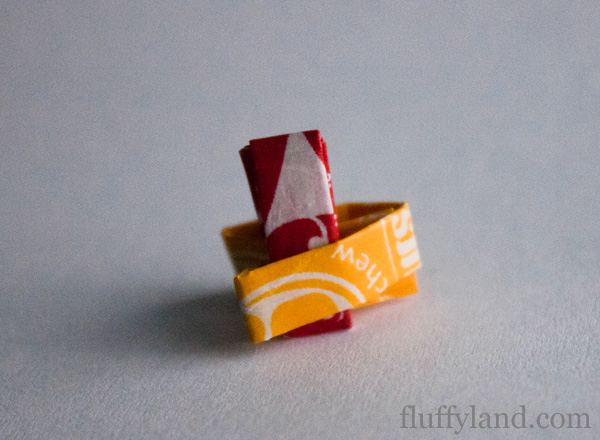
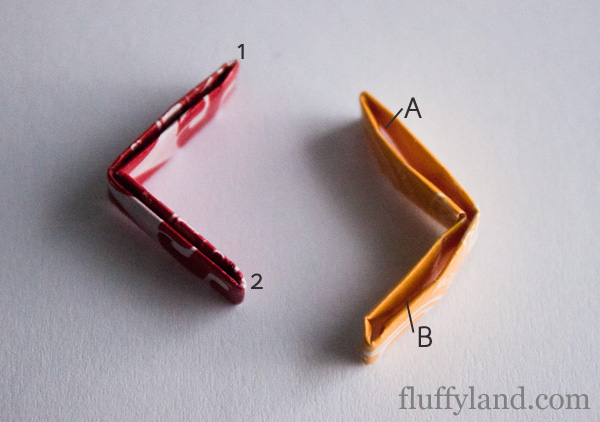
starburst wrapper bracelet tutorial starburst wrapper bracelet tutorial

Step 10
starburst wrapper bracelet tutorial starburst wrapper bracelet tutorial
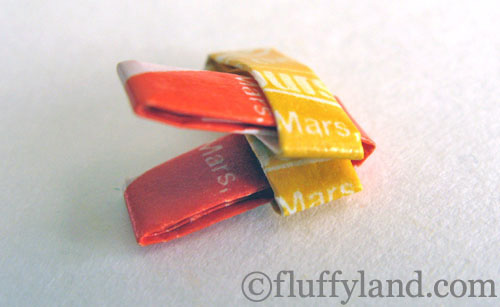
And pull it through.

Step 11
starburst wrapper bracelet tutorial
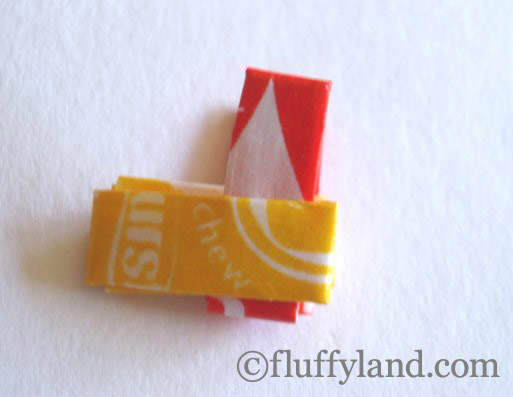
Continue steps 1-10

Step 12
starburst wrapper bracelet tutorial
… until you begin to build up a chain.
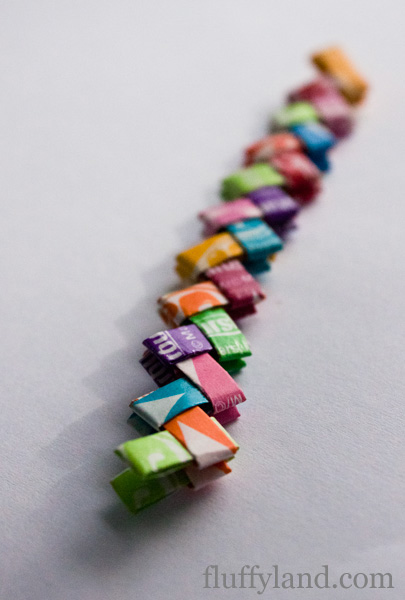
Step 13
starburst wrapper bracelet tutorial
Once you have reached the desired length… this is where it gets tricky.
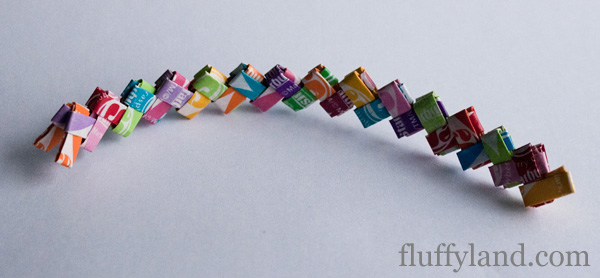
Step 14
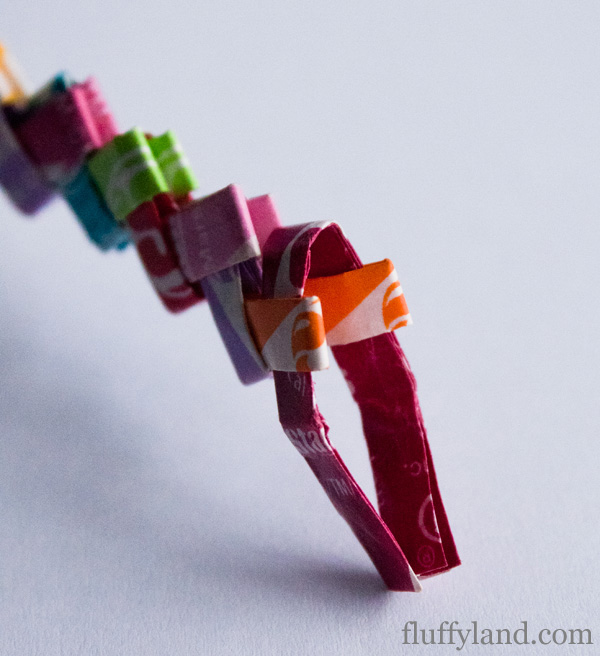
starburst wrapper bracelet tutorial starburst wrapper bracelet tutorial
.. fold one more wrapper the same way as the others, but then unfold the last two folds. Insert these raw edges into the same spots in the “V”.
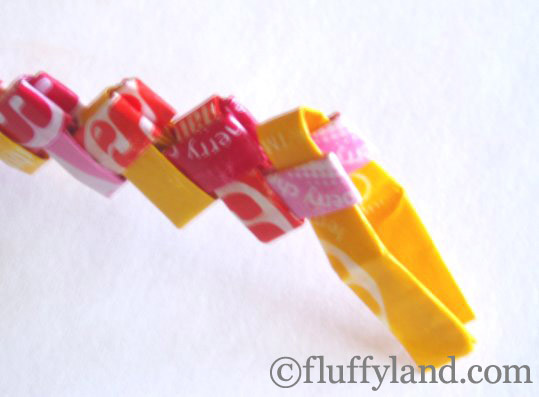
Step 15
starburst wrapper bracelet tutorial
Pull the two ends of the bracelet close together, and hold the edges of your long “V” over both edges of the end of the other side.

Step 16
starburst wrapper bracelet tutorial
Insert the raw edges into the first wrapper. You’re doing the same thing we’ve been doing, but backwards.
Step 17
starburst wrapper bracelet tutorial
Pull ends through until you reach the original folded point.

Step 18
starburst wrapper bracelet tutorial
Tuck the raw edges into the previous wrapper, so it looks just like the other wrappers in the chain.
tip! at this point, i find it helpful to use a paperclip or similar item to push the wrappers through.

starburst bracelet!


Jun 8, 2009

Tutorial: How to Make a Light Box

I found this tutorial on making a light box. What I love about it is the simplicity and the added bonus that these items can be found at most dollar stores and therefore, can be made inexpensively. I post a lot of pics online, so I'll be making one of these myself in the very near future. Thank you to pawandclawdesigns for this tutorial (Visit her shop for some great finds at etsy: www.pawandclawdesigns.etsy.com). Here's the tute:


The dollar price included the following;

  • 1 20 inch X 30 inch Piece of White Foam Board ( Office Supplies)
  • 1 Adjustable Utility Blade ( Hardware)
  • 1 Roll Packaging Tape ( Office Supplies)
  • 1 Yard Stick (Office Supplies)
  • I Package Assorted Color Construction Paper (Toys or Office Supplies)
Honestly, I spent a buck. I had everything but the foam board already at my house. If you need to buy EVERYTHING, you'll need 5 bucks.

MAKE THE BOX
  1. Measure and cut the foam board along the 30 inch side. I cut mine 7 inches into the board, so i had a 7 by 30 inch rectangle of foam board. I used the adjustable utility blade and the yard stick.
  2. Cut a 7 by 7 inch square off the end of the rectangle you just cut ( or the amount equal to the width of your cut rectangle) This will be the bottom of your studio. Cut the remaining rectangle to 14 inches long 7 inches wide.
  3. This next part is tricky. you need to adjust your blade to just a bit LESS than the thickness of your foam board. Mine is 1/4 inch, so I made the blade depth just less than 1/4 inch. Next measure in 7 inches on the foam board ( so it's split in half) and cut the board, being careful not to cut ONE side of paper on the board. You now have a "V" of 2 attached 7 inch foam board squares.
  4. You MIGHT need an extra set of hands for this part. I was able to do it myself, but my tape looks icky. Thank goodness it's on the part of the box you don't see. Cut and attach two 7 inch pieces of packaging tape to the bottom square. Try to make them centered as best you can, so half of the edge is left out. Now, carefully bend the 2 attached squares to a 90 degree angle and set them on the bottom. carefully fold the tape up to secure the "sides" to the bottom.
DONE!

BACKGROUNDS

Using the utility blade and yard stick, cut one of each color of construction paper into 7 by 7 inch squares. i like to do 3 of each color so I can "line" the box with color if I need to take a picture of a larger item.

You're done! To store it, set the paper squares inside the box and set it come place out of the way.

To use it, take it to a sunny window, a well lit part of your house, or even outside. lay out the pieces of paper that compliment your item, stage the shot, and photograph.

Voila!

Jun 7, 2009

Baby Bib: Made from Recycled Food Packaging

In my daily finds today, I came across this idea of making a unique baby bib from recycled food packaging (in this tutorial, a package of Betty Crocker cookies). Here's the tutorial with instructions!Thank you to www.ILuvMoJo.etsy.com (She has a super cute shop at Etsy.com) for permission to use this tutorial.

Recycled Food Packaging Bib Tutorial

You'll need:
  • Bib - to make a pattern
  • Food wrapper of some kind
  • Clear vinyl
  • Flannel or Fleece
  • Scissors
  • Thread
  • Velcro or Snap
  • Needle and Thread or Sewing Machine

Step 1: Place your bib onto a large piece of paper and trace around it to make a pattern. Cut it out.


Step 2: Place the pattern piece on top of your wrapper to make sure it will work. You can make almost any wrapper work just by cutting it apart and taping it back together in the right shape.


Step 3: When you have your wrapper all ready to go put it on top of your fabric wrong side to wrong side and then place the clear vinyl on top.


Step 4: Pin the pattern on top and cut around it.


Step 5: Remove the pattern and sew around the outer edge of the bib. If you're using a sewing machine this part can be a little tricky, so go slow. ;)


Step 6: Add VELCRO or a snap to make it close and you're all set!

Jun 6, 2009

Tutorial: Envelopes & Cards Made From Magazines

I really love art made from recycled items. Sometimes I just google a recyclable item and see what people are making out of them. A couple of nights ago, I googled "magazines" with the word "recycled" and "art" (with probably a few different variations), and discovered this pretty simple little tutorial on making envelopes and cards from recycled magazines. I thought they were adorable, and helped create a unique touch to any note card you might want to send. The possibilities are endless with this tutorial, so have fun with it. I'm in the process now of experimenting with it, along with my zillion other projects I've got going on. Special thanks to www.estelledeparis.com for permission to put her tutorial on my blog. She's very talented and I would encourage everyone to check out her blog and etsy shop :)


What do you need?
-Magazines
-An X-Acto knife
or a pair of scissors
-An envelope you take apart or a template you made in illustrator, photoshop or that you draw.
-A fine point or ultra fine point sharpie
-A ruler and/or a triangle. Triangles are neat to mare square edges.
-Glue
-Craft paper, card stock
-Optional: Lick & Stick Envelope Glue 1.5 Oz. Remoistenable or scrapbook/photo mounting tape You might consider getting some if you sell them or if you give them as a gift

Note:
-I use 3 different size templates that I lay on the illustrations I preselected and use the one that covers the picture the better.

The Envelopes

For this tutorial I’ve selected a painting from the magazine antique, one of my favorite source for making those fancy envelopes of mine.

envpreselect

1.Lay your template on the picture and outline with a pencil.

envoutlinetemplate

I personally prefer to cut paper with an X-Acto knife as it makes the edges perfectly straight but if you don’t have one, scissors work fine.

envcut

It should look like this

3.Fold the flaps.

envfold00

It should look like this.

4.Line the inside. (Optional) You can line the whole envelope or just the flap, it’s up to you. Just note that lining the envelope makes a thicker material that would not rip easily. It can be a good idea if you consider mailing it.

First, make a template of the desired size. I copied the envelope template and cut it.

Glue your flap.

envglueflap

5. Glue the side flap and the verso of the envelope.

Recto
DIY envelopes & cards
Verso
DIY envelopes & cards

You can make tons and tons of them!
DIY envelopes & cards

The cards

Depending on your selection you can make one that opens like a check book or one that opens like a regular book or a single sheet one. Here are a few exemples.

For this tutorial, I chose 3 pictures that I thought were matching the style of the envelope and decided to make a “tryptich” card. It is up to you and what you have to work with. I find it easier to make the card around preselected images rather than make the card and illustrate it afterward.

1. Make the card 1/8″ smaller than your envelope all the way around. It is very important to do so or your card will not fit the envelope!!!

2 Outline your picture with colored paper or card stock.

3.Glue the pictures on the card and voilĂ !